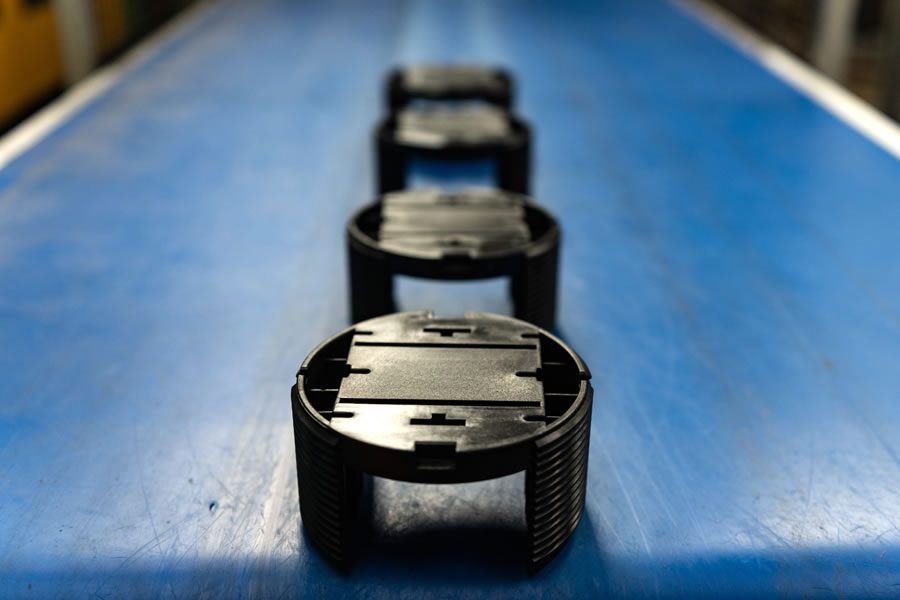
Plastic injection moulding is no different to any other industry when it comes to products having defects. But, with the correct design from the beginning, these can be avoided. Involving Plastic Supplies Dudley – the toolmaker of choice – from an early stage in the design process, it enables the production of the best possible part. It can allow us to advise you on any parts of the design that may need changing. This can also reduce the time is takes for you to start having parts in production, as we can hopefully get parts of the tool to the highest quality from the first time of moulding.
Moulding Defects Caused By Process Problems
These plastic injection moulding defects can often be prevented just by adjusting some settings in the moulding process. You can usually avoid these by:
- adjusting the temperature of the tool,
- the pressure of the mould, or
- adjusting the flow rate of the material.
Burn Marks
A burn mark occurs when there is insufficient venting on the tool. The venting allows the gases that occur in the moulding process to escape. As a result, if the gas is trapped within the tool, it is then overheats and causes a burn mark on the product.
To improve this problem, localised venting is required on the tooling. It generally occurs on the area of the product that is the last place to fill in the tool. Other ways of preventing burn marks are:
- Reduce the injection speed. This will hopefully limit the risk of getting trapped air in the mould.
- Increase the venting on the tool to allow for any trapped air to escape easily.
- Lower temperatures to prevent any overheating of the mould or material.
Sink Marks
A sink mark is a small depression in the part where is should be a flat surface. This can occur when the inner part of a moulding shrinks excessively, causing the material from the outside to be pulled in. This usually occurs when the section of the moulding is too thick and hasn’t been given enough time too cool in the mould. The best ways to prevent this defect from occurring are:
- Design the mould with a thinner wall section. If it is a thick section of the product, you could core out the moulding and put in webbing which would actually make the part stronger.
- Increase cooling time to limit the amount of shrinking.
- Increase holding pressure and time. This will allow the material near the surface longer to cool and set before being ejected from the tool.
Warping
Warping is a plastic injection moulding defect that occurs when different parts of a product shrink unevenly. This happens during the cooling process and can put undue stress on different areas of the product. This can result in the part twisting or bending. It is easiest to see when a product needs to lie flat but ends up leaving a gap between the base of the product and the surface it is lay on.
The major cause of warping is when a product cools too quickly or is not held in the tool for long enough. Another cause could be the tool design, where certain areas of the product have different wall thickness. Consequently, causing differing cooling times which will then result in a warped product.
Some common ways of preventing this issue are: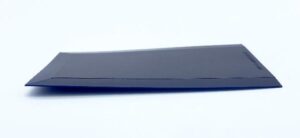
- Increase cooling time and ensure that it is a gradual process.
- Redesign mould with thinner wall thickness.
- Increase the number of gates feeding the cavity to create a more even flow of material.
- Try a different material that will shrink less.
Weld Lines
There is always going to be weld line somewhere on the product where the two halves of the tool come together. Depending on how the part is made in the tool, will depend on how visible this line is. The weld line that you do not want is where the material has come from two different directs and met in the middle. It will show as a hair like weld and will result is a weak bond in the material. This will then lower the strength of the product and it could easily break at this point.
It is due to the material starting to solidify too early. When it is coming from the two different directions, it needs to maintain a certain temperature to stay molten for when it collides. If the material has started to solidify, it will not bond successfully where it meets.
The best preventative measures for this are:
- Increase the injection speed and pressure.
- Increase material temperature so it stays molten for longer.
- Switch to a different material, or try to get a higher melt flow version of the material being used.
- See if the tool can be resigned.
Jetting
This will occur when there is an initial jet of molten material that when injected into the cavity, will start to solidify before the cavity has been filled. It will often appear as a squiggly line on the surface. In addition, will usually appear from where the material is fed on the product and can result in making the part weaker.
Moreover, it often occurs when the injection pressure is set too high. It is better for the material to be injected into the cavity gradually, rather than forcing the material through a small gate at high pressure. Ways to avoid this defect are:
- Increase temperature of both material and the mould.
- Redesign tool so that the gate is located in a different position.
- Reduce injection pressure so material flows into the cavity more gradually.
As part of our quality control process, we are always looking out for any plastic injection moulding defects that occur. So that hopefully, the customer will always receive their products that are the highest possible standard. We always aim to set up the job to have as little defects as possible right from the first shot as it can become very costly when producing scrap parts.
Please look out for our next blog on other plastic injection moulding defects that can occur because of tooling issues.